Spiderpole 12m made by Spiderbeam is very useful for portable ham radio activities. To do the job it must be properly anchored. This pole may be anchored at the bottom (at about height of the first element) which allows it to withstand wind speed of abut 80 km/h, and at 7 meters high using guying lines (as recommended by manufacturer) which allows surviving windows of 120 km/h.
Anchoring at the bottom seems not suitable for portable, as it requires either to have already set strong short pole (fence or something) to attach pole, or dig one into the ground. Using guying lines seems more suitable for various situations.
Guying point
The only complication in constructing guying system is making guying ring that goes on the pole (actually, you can buy guying belt sold by pole manufacturer if you are not willing to home-brew).
Finally I got idea how to make it, when I saw white plastic chopping board my wife YU4JSH used in a kitchen. I did not steal hers but got brand new one from nearby store. It is about 5 mm thick white plastic, very sturdy but with silky feeling on touch, very much like plastic I saw used for antenna isolators.
I needed to cut ring, so I decided to use wood hole saw kit that has several circular tools to cut various holes. First I cut using larger tool, about 60mm diameter giving me 60 mm disk. Then I cut another hole in that disk with tool about 25 mm diameter which gave me needed ring.
Inner diameter of ring should be 27 mm so 8th element of pole can pass through making ring sit on top of 7th element. Diameter may be a bit larger to allow pole to turn within ring, but not more than 28 mm. Cutting with 25 mm tool gave me hole of approximately 27 mm. After some grinding to get finer surface and smooth edges I got diameter that is just right – it sits firmly on top of 7th element and pole can be easily rotated. I also tried using cone step drill tool which forks even better.
 Outer diameter is not critical. I decided to go for 60 mm as I had tool for that size.
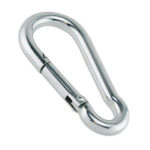
I found out some nice steel 5×50 mm spring carabiners which I decided to use to attach guying lines to guying point. After few trials I found out that attaching hole should be 6.5 mm in diameter and center of the hole should be 7 mm from outer edge of the ring to let carabiner snap on and off easily.
Guying lines and anchoring
For guying lines I decided to use 7 core yarns paracord. It is declared to withstand tension of 250 kg which I think is strong enough and it seems very light so id does not add much weight to the pole.
At first, I wanted to go safe, meaning setting u guying lines on 45 degree angle for the best stability, and also I set guying point at 8 meters high. I ended up with four more than 12 meters long guying lines and anchoring points on the ground at 8 meters away from pole. That is huge space needed to set up pole and not very practical.
I abandoned that idea and decided to follow manufacturer recommendations to set guying point at 7 meters high, and use anchoring at 5 to 6 meters away from pole. That required four guying lines each about 10 meter long. About 9 meters long guying lines are actually needed but it is good to have some more for case that terrain where pole is erected is more demanding.
I used small aluminum 18 cm long tent pegs for anchoring to the ground. They do seem short so if they show not strong enough I would have to replace them with some longer ones.
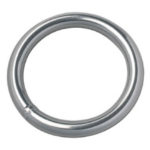
Pegs I used have hard edges so I used small steel rings (about 3 cm diameter) as spacers to attach paracord to pegs protecting rope from damage.
The last item I had to use is rope tightener. It is made out of aluminum and has shape that allows detaching rope so other than using pegs I can also easily attach guying line around tree or any other suitable object.
Installation
Once everything is built and set-up, pole installation is very simple, quick and easy done by single person.
You have to choose center point where you want to place your pole, and set four anchoring pegs at 5 to 6 meters away forming a cross.
Then, you prepare guying ring, attach guying lines to the ring and to the anchoring pegs set to length you already predetermined.
Take the pole, sat it upright and extend top element making it go through guying ring. Now just keep extending each element in a row making pole going up. With last element extended, guying lines will be tightened enough to do their job – keeping pole vertical. If necessary you may additionally adjust guying lines to make pole stay exactly vertical.
Do not overtight guying lines. They actually do not have to be tight. Let it just a bit loose to avoid adding unnecessary tension to the pole.
You might need help for first time until you determine guying lines length. Once it is done, you can mark proper length and you will be able to set everything up in future with no help at all.


