I’ve got UV-B5 years ago. It survived lots of use and still served fine. There was one glitch – in some moment latch that keeps battery locked was broken. Radio was still usable but it happens from time to time that battery slips out of socket and radio silently turns off. It was quite annoying but hardly fixable issue.
Until today.
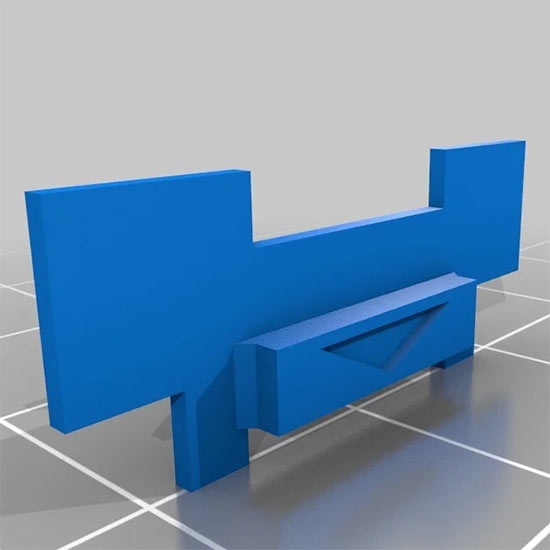
As I recently got myself 3D printer (Prusa I3 MK3S) I get to an idea to model and print replacement part. As every experienced computer expert, I first looked if someone else already did that. And indeed, Thingverse member Olex had the same issue and already did modeling. His model is available at https://www.thingiverse.com/thing:3747537 .
All I had to do was to download model, load it in Prusa Slicer, sliced it and print it. Original part is made of metal with some fine details that 3D printing cannot match, but who care of looks if it works. And it does work fine. It did require some minor filing and sanding but that is expected for such tiny part. It took about 20 minutes including slicing and printing time.


Blue color does look bit odd but right now that is what I had. This corona pandemic exhausted all available filament resources in country so I could not get black coloured one, which would fit better. I finally decided that is is pretty cool to have customized part for the radio.
Now to some instructions
For printing there is not much to say. Read instructions Olex gave in 3D model description .
I printed using PLA at 0.10 mm layer height and 15% infill (took 11 minutes to print).
Support is necessary as part has overhangs. Cleaning support is bit tedious as part is very small.
Olex also gave details haw to replace part in radio.
Opening radio is easy. The only tricky part is getting broken latch out. There is lock on inside side which needs some persuasion. What You have to do is to take flat screwdriver, insert it between latch and housing and push housing inwards to move lock and push latch up but finger to get it out of slot. Eventually it will pop out. Pay attention on springs no to follow and jump out with no control.
Then you just insert replacement in. However, do not hurry. Before doing that carefully check if it needs some more filing and sanding to fit nicely. It has to move freely inside the slot. There is catch too: latch locks battery by entering two narrow slots in battery housing. That means you have to check if latch also fits those two slots. I did not do it, and now it needs bit of persuasion each time when I am locking battery. Learn on my mistake.
It is good idea to print several of this latches. Original was metallic and I managed to break it (so did Olex). It is to be expected that plastic replacements would break more easily.
Thanks note
Olex, thank you. By generously sharing this model you saved me lot of time.